MP15AC Conversion Shell $30.00
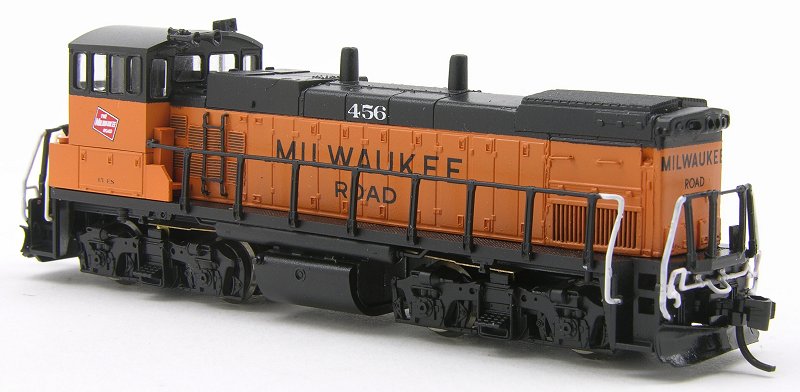
The MP15AC was a much requested model since it is not available by any players in the N Scale locomotive market. Atlas came close with their MP15DC version and the Skytop Models conversion shell is based on that model. The master model was kitbashed following an article by Steve Lohr published in the May/June 2010 issue of N Scale Railroading. Please note that a copy of that article is handy to have to detail a Milwaukee Road MP15AC. I have posted a basic build below for those building other versions or not able to obtain the article. Hopefully It should get you up and running.in practically no time! 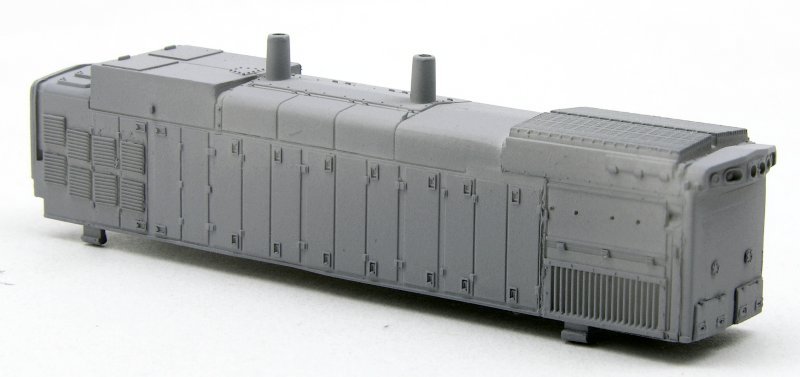
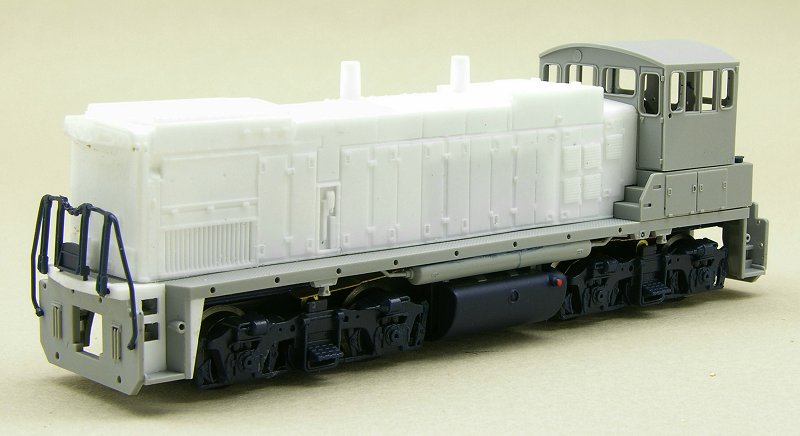
MP15AC conversion shell painted in gray primer.
Basic MP15AC Build
Basic MP15AC Build
I'm going to document the basic build process for the Skytop Models MP15AC conversion shell. This will get you through the construction phase of the model and leave the final details up to you for your particular railroad. You will need to start with an Atlas MP15DC. However be careful when choosing your base model as the details vary on the Atlas models depending on the railroad. The sand fill hatches behind the cab come to mind as there are a couple of variations. Now, let's get started. The first step is to totally disassemble the model and strip the paint if it is decorated. There are many small parts, so put them in a safe place until needed. The front platform is the hardest part of build and we'll begin there.
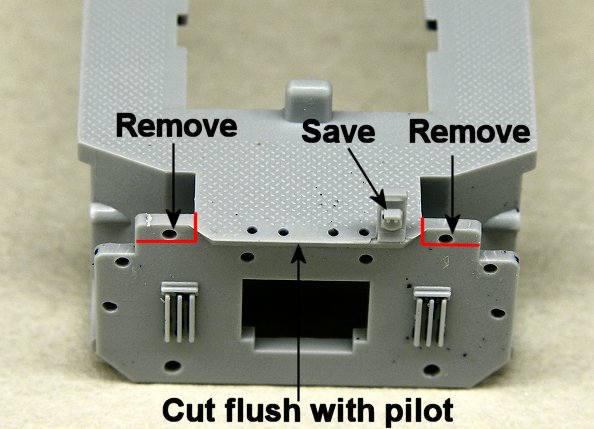
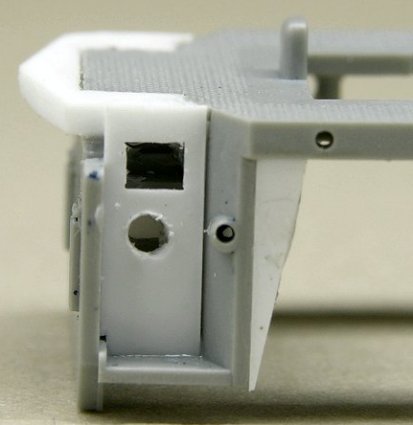
The original article in NSR was somewhat unclear about a few steps when extending the front platform. Hopefully this will clear things up a bit. In addition to removing and saving the small front MU stand, there are two small rectangles of plastic that need to be cut away from the front pilot. Also trim the anti climber flush with the face of the pilot.
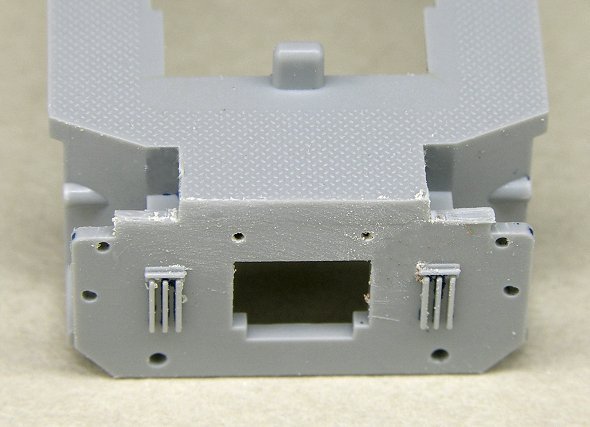
Here is the front pilot after being modified.
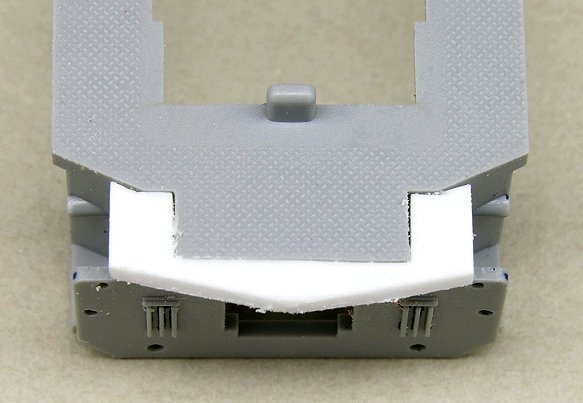
Extending the front platform is next. It is harder to describe than to fabricate. It is made from a piece of .040 sheet styrene about 9/16” wide and it extends about 1/16” beyond the front of the pilot. Remove a center portion to make a U shaped piece to fit around the original walkway. Work slow and only remove a bit of material at a time. Test fit often. Glue this piece in place once you are satisfied with the fit.
New steps are made from a piece of .010 styrene about a scale foot and a half wide. Be sure to notch the lower front corner and glue in place. Once the glue sets, drill a small hole through the styrene and enlarge it to a square shape with a new sharp #11 hobby blade. The styrene is thin and easy to cut to size. I didn't measure anything, I just worked slowly and “eye balled” the step holes. The gusset next to the step is a piece of .020 x .060 styrene cut to length and then into a triangle.
The front handrails are next. Insert the lower ends into the original holes. This allows you to see and mark where new holes to mount the handrails need to be drilled. Use a #72 bit to drill into the face of the walkway for the outermost stanchion. Then use a #77 bit to drill for the inner stanchions into the top of the walkway.
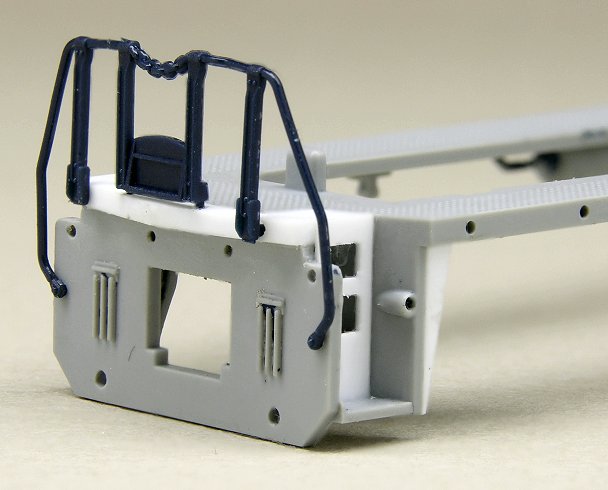
Test fit the Skytop Models MP15AC conversion hood piece onto the frame. In the photo below it's hard to see the hood in place but the four mounting lugs are plainly visible. Check and make sure the four mounting lugs are seated properly. The front lugs may need to be trimmed a bit.
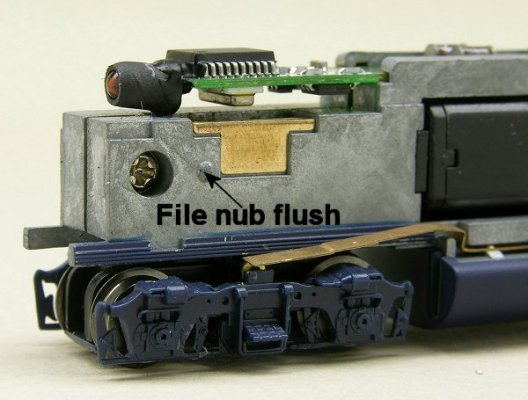
The little nub that held the original hood in place at the front of the chassis needs to be removed. File it flat with a small file and test fit the Skytop Models conversion hood. The nubs at the back of the chassis may also need to be filed slightly if they make the hood bulge out at all.
Lastly assemble all the main components in order to get a good test fit. Try running the mechanism to make sure the front trucks clear the new front gussets. Once all is in order, the basic MP15AC build is finished I'll leave the rest up to you to paint and detail for your favorite railroad !
The original article in NSR was somewhat unclear about a few steps when extending the front platform. Hopefully this will clear things up a bit. In addition to removing and saving the small front MU stand, there are two small rectangles of plastic that need to be cut away from the front pilot. Also trim the anti climber flush with the face of the pilot.
Here is the front pilot after being modified.
Extending the front platform is next. It is harder to describe than to fabricate. It is made from a piece of .040 sheet styrene about 9/16” wide and it extends about 1/16” beyond the front of the pilot. Remove a center portion to make a U shaped piece to fit around the original walkway. Work slow and only remove a bit of material at a time. Test fit often. Glue this piece in place once you are satisfied with the fit.
New steps are made from a piece of .010 styrene about a scale foot and a half wide. Be sure to notch the lower front corner and glue in place. Once the glue sets, drill a small hole through the styrene and enlarge it to a square shape with a new sharp #11 hobby blade. The styrene is thin and easy to cut to size. I didn't measure anything, I just worked slowly and “eye balled” the step holes. The gusset next to the step is a piece of .020 x .060 styrene cut to length and then into a triangle.
The front handrails are next. Insert the lower ends into the original holes. This allows you to see and mark where new holes to mount the handrails need to be drilled. Use a #72 bit to drill into the face of the walkway for the outermost stanchion. Then use a #77 bit to drill for the inner stanchions into the top of the walkway.
Test fit the Skytop Models MP15AC conversion hood piece onto the frame. In the photo below it's hard to see the hood in place but the four mounting lugs are plainly visible. Check and make sure the four mounting lugs are seated properly. The front lugs may need to be trimmed a bit.
The little nub that held the original hood in place at the front of the chassis needs to be removed. File it flat with a small file and test fit the Skytop Models conversion hood. The nubs at the back of the chassis may also need to be filed slightly if they make the hood bulge out at all.
Lastly assemble all the main components in order to get a good test fit. Try running the mechanism to make sure the front trucks clear the new front gussets. Once all is in order, the basic MP15AC build is finished I'll leave the rest up to you to paint and detail for your favorite railroad !