Milwaukee Road GP-20 early version $40.00
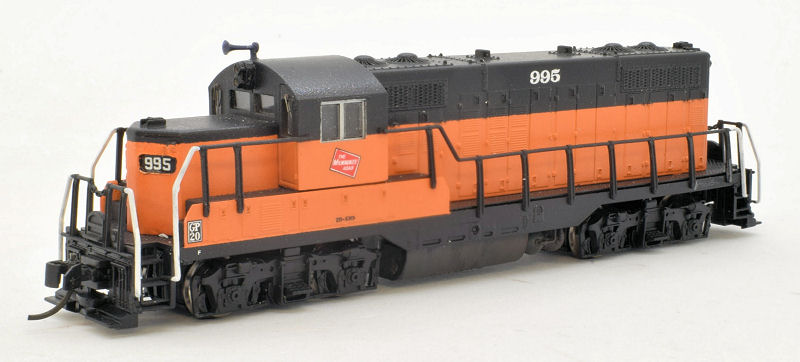
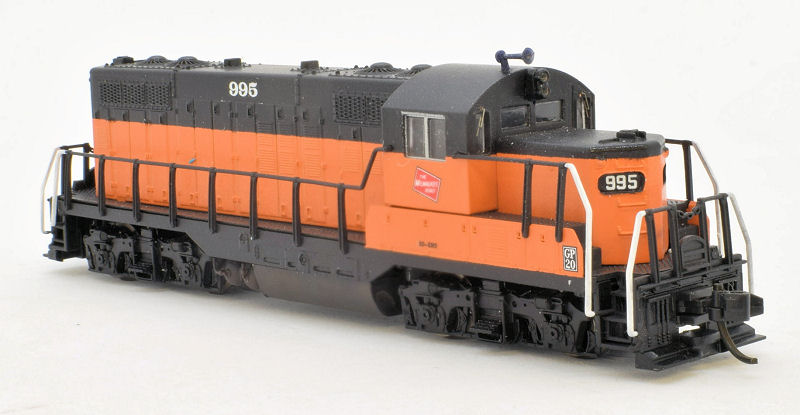
The Milwaukee Road upgraded a group of GP-9's to GP-20 status starting in June 1969 and ending in October 1973.
A total of 54 GP9's were rebuilt and renumbered downward from 999. The first group was done between June 1969 and July 1970.
Externally, numbers 982 to 999 had their noses chopped by removing the bottom half of the short hood and retained their numberboards in the shortened hood. A split window cab front was fabricated and a twin beam headlight was added.
This is the version that the Skytop Models conversion shell is modeled after with the exception of units #986, 991 and 993. Note that those units retained their dynamic brake blisters even though they were removed during rebuilding.
Later modifications to the prototype units saw the addition of either Horst or Farr paper air filters.
Basic GP-20 Build

The conversion shell will fit on either a stock Atlas GP-7 or GP-9 chassis. The cab and body are separate castings. This makes it much easier to add window glass in the cab after painting.
The original Atlas cab window insert will fit in the new cab although you will need to add glass to the two new windshield windows.
You may want to check some prototype photos before starting this project because it seems like no two of these engines were exactly alike. The little details varied quite a bit from unit to unit and throughout the life of each unit.
The basic build process for the Skytop Models Milwaukee Road GP-20 conversion shell is relatively easy since the casting is a direct replacement for an Atlas GP-7 or GP-9 body shell.
This will get you through the construction phase of the model and leave the final details like painting and decals up to you.
Remove the stock body from the mechanism save the cab window glass and numberboard /headlight glass. Clean up the casting by removing any resin flash around the windows. After that is completed, wash the casting in Mineral Spirits in order to remove the mold release compound !
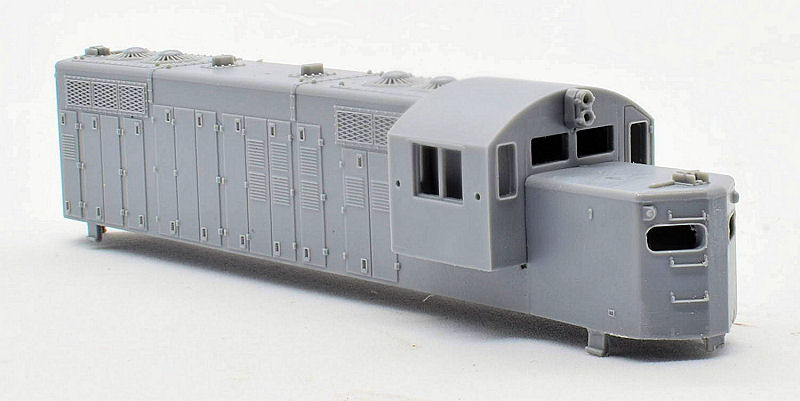
Here are the castings. They will fit on an Atlas GP-7 or GP-9 mechanism.
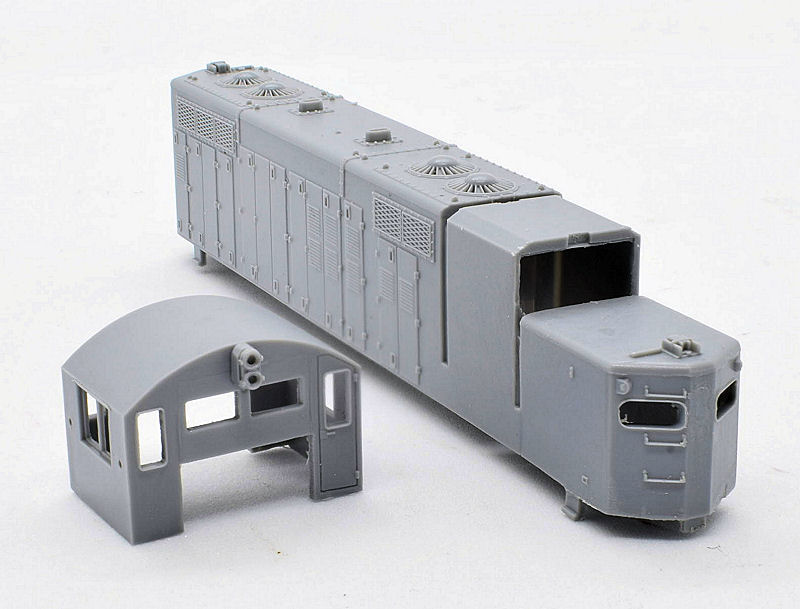

Here are the castings. They will fit on an Atlas GP-7 or GP-9 mechanism.

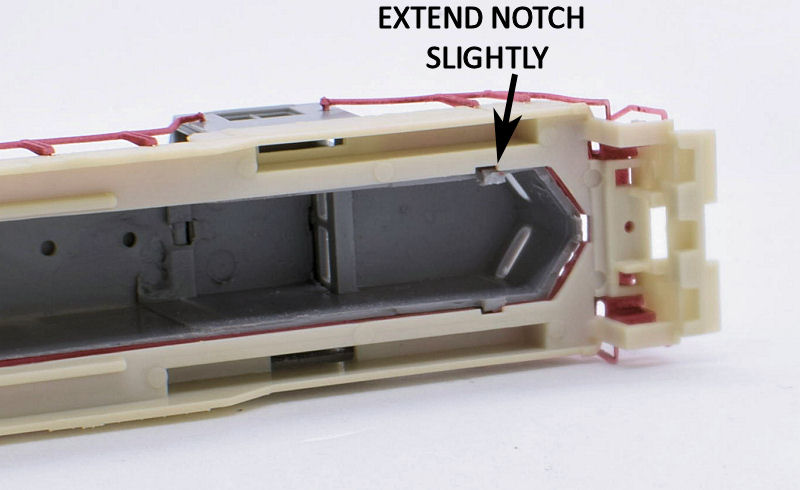
Attach the shell to the sill and handrail pieces and check to see if the little tabs are interlocked properly.
If the tabs on the shell are not lined up properly with notches on the handrail/sill pieces, the notches can be cut larger to extend them slightly so the tabs catch as intended.
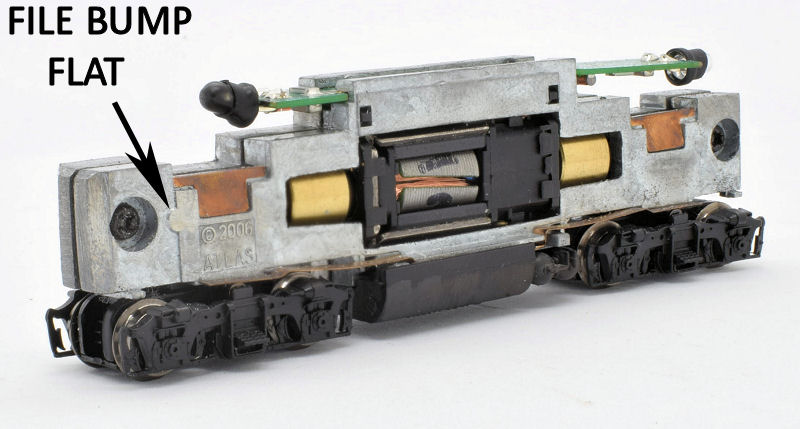
 The chassis has 4 alignment bumps (2 on each frame half, one near the front and one near the rear).
The front bumps (in the area of the short hood) need to filed flat since the short hood does not have the corresponding recess. Test fit the shell on the chassis.
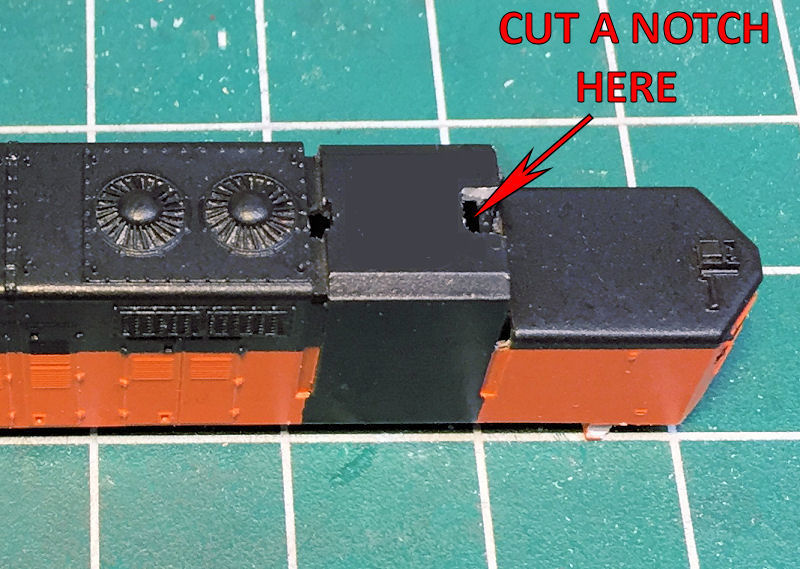
 The notch in the top of the shell in the front of the cab area is to allow room to run wires to the twin headlights. I have found the best option for headlights is to use two prewired 402 LED's wired in series and glued in place in the twin headlights.
