C&NW "Hammerhead" RSD5 Conversion Shell $35.00
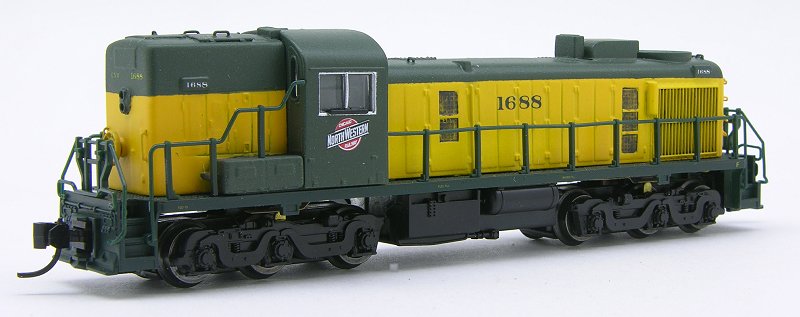
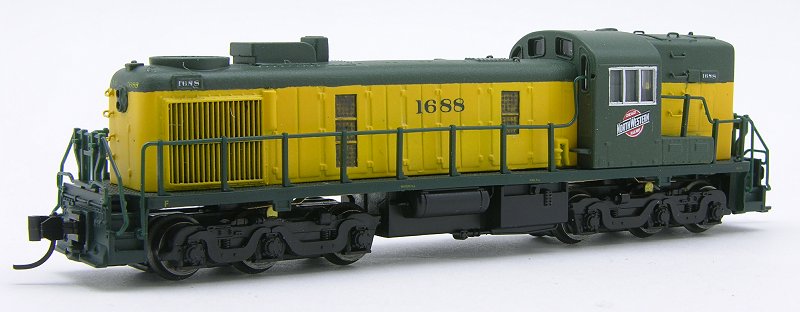
The C&NW purchased three Alco RSD5 models that were nicknamed "Hammerheads" because they had high short hoods that contained steam generators and dynamic brake equipment. Interestingly, the "hammerhead" was actually the rear of the unit. In any case, the three units were numbered 1686,1687 and 1688. Originally bought to replace steam power on Chicago area suburban trains, they were later operated on the "Alco Line" from Winona, MN. to Rapid City, SD. Somewhere in between these assignments their steam generator and dynamic brake equipment were removed. 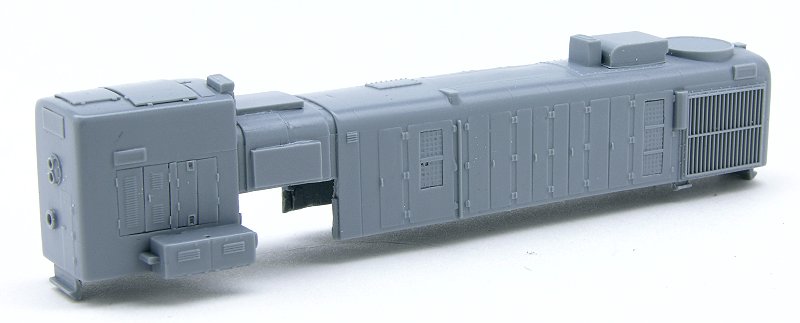

"Hammerhead" conversion shell.
The master model was kitbashed by Vince Kotnick and he was kind enough to loan it to me in order to make castings. Thanks Vince! The casting is a direct replacement for the stock Atlas CLASSIC body shell. Note that it will not fit the original Atlas (Kato-Japan) version. The stock cab will need to be modified slightly (see below) and grab irons will need to be installed along with paint/decals.
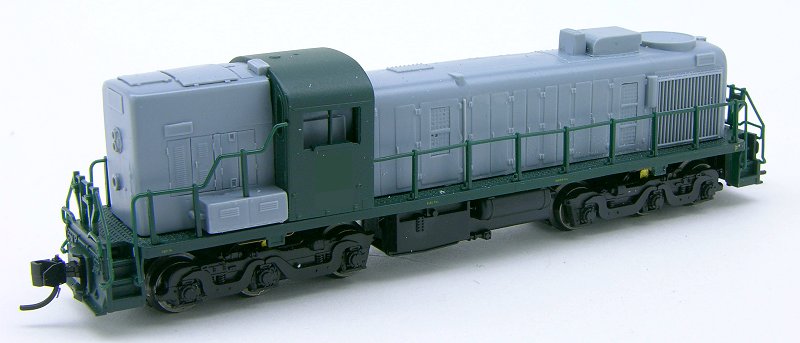
Basic "Hammerhead" Build

The basic build process for the Skytop Models "Hammerhead" RSD5 conversion shell is relatively easy since the casting is a direct replacement for the stock Atlas body shell. This will get you through the construction phase of the model and leave the final details like painting and decals up to you. You will need to start with an Atlas CLASSIC RSD4/5. Remove the stock body from the mechanism and then disassemble the body by removing the cab, handrails and window glass. This might also be a good time to wash the casting in Mineral Spirits in order to remove the mold release compound !
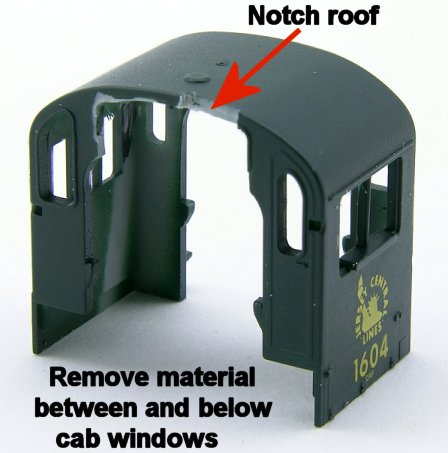 Now is the time to modify the stock cab. This is done by removing the cab wall material between and below the windows that face the high short hood. A notch also needs to be made in the roof to clear the steam generator exhaust stack. This is best done by trial and error; test-fit, trim, test fit, trim until it's right. Once you're satisfied with the fit of the cab on the casting, it's time to move on to adding grab irons, paint and decals.
Grab iron dimples are pre-located on the casting and need to be opened with a #80 drill bit. I used BLMA 15 inch drop grab irons for most of the grabs but there are a few that need to be hand formed out of .008 phosphor bronze wire. The longer grab on the long hood is particularly hard to bend as it also curves to the side. Alternatively the dimples could be filled in with putty and sanded smooth if you don't want to bother with the grab irons.
Microscale #60-962 C&NW hood Diesels (1948-1960) or Microscale #60-290 C&NW Diesels (1960-1980) decals would be appropriate after painting in your favorite brand of C&NW Yellow and Green paint. Lastly, enjoy your unique C&NW "Hammerhead" !
