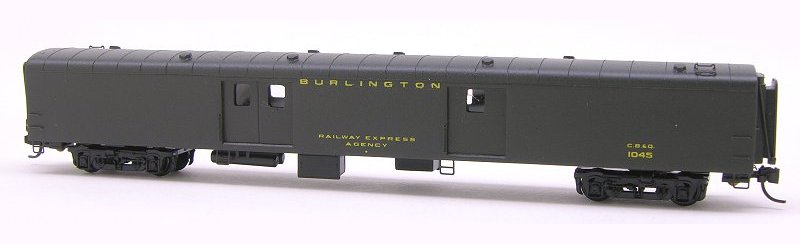
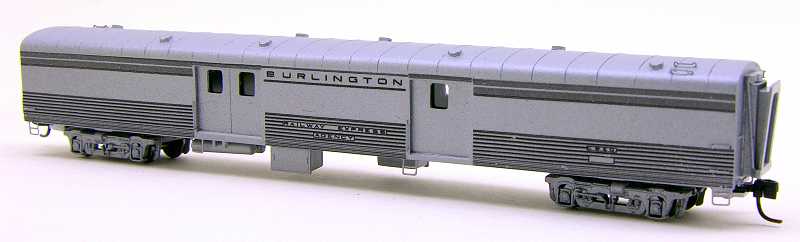
N scale CB&Q Havelock "economy" baggage car
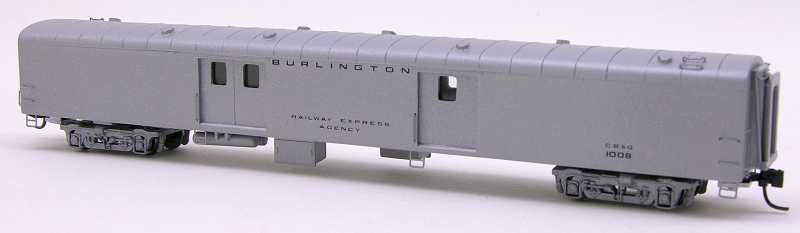
The Chicago Burlington and Quincy built a total of 60 "economy" baggage cars in its Havelock shops between October 1950 and September 1953. Twenty cars #990-1009 were assigned to Zephyr service and wore Aluminum paint. Some of these cars also had shadow-lining applied for time in an effort to better blend them with the fluted stainless steel cars. The other 40 cars #1015-1054 were painted Burlington dark green and assigned to the general passenger pool.
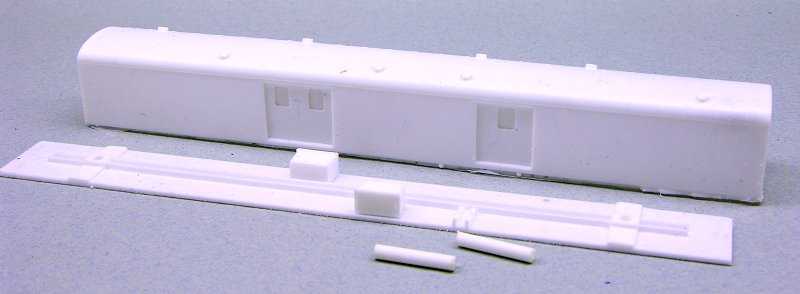
Shells are now available for Burlington Havelock baggage cars. Included with the shell is the underframe casting and two air tanks. The builder will need to add Micro-Trains trucks, American Limited diaphragms, couplers, window glass, grab irons, paint and decals. There are dimples in the shell where the grabs are located. They can be filled in with putty and sanded if you don't wish to add them.
The shell and underframe casting allow the modeler to quickly assemble a prototype Burlington Havelock baggage car without going through the trouble of hacking up a passenger car core kit. It can be troublesome for some modelers to shorten both the core kit roof and underframe. In addition, cast into the shell, are the roof seams. These are rarely modeled and all the hard work is done for you. The bright white shells are hard to photograph so take a look at the completed and painted models to see the details a little better.
Assembly Tips
1) Wash parts in Mineral Spirits to remove mold release.2) Remove all flash from shell and underframe.
3) Test fit underframe in shell. Use files and sandpaper if necessary to get a good fit.
4) K & S .064 x 1/2 inch brass strip makes a good weight for the model. Drill two holes in brass weight to clear truck mounting screws.
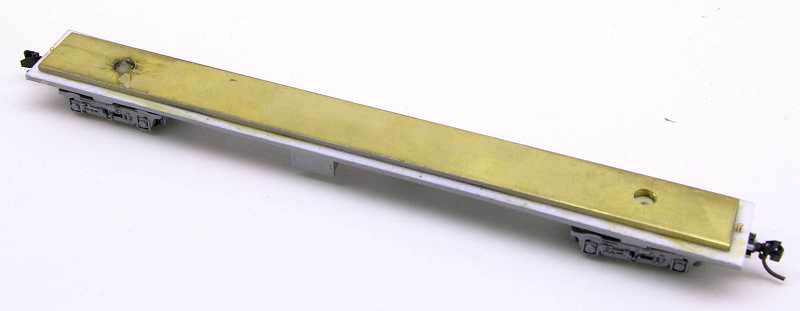
5)The Micro-Trains trucks need to be modified. Cutting off the mounting ring on the top of the truck will allow the shell to sit at the correct height.
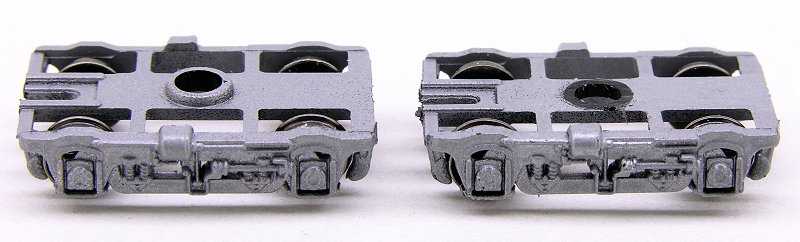
6) I recommend body mounting Micro-Trains #1015 couplers to the underframe. Drill and tap a hole measuring one N scale foot in from each end of the underframe.
7) Drill out all holes for the grab irons. The roof top grab irons are sized to accept Gold Metal Models #3 & #4 grabs from set 160-56. The grabs along the baggage doors accept #5 from the same set. The grabs on and near the ends of the car should accept BLMA 18" grab irons. I usually bend my own grabs out of .008 phosphur bronze wire with the exception of the roof top and end drop grabs.
8) The steps under the baggage doors and near the car ends are also Gold Metal Models. They are from set #160-26 Kato Passenger car details. There are no dimples in the shell provided for these steps. The modeler will have to mark and drill them accordingly.