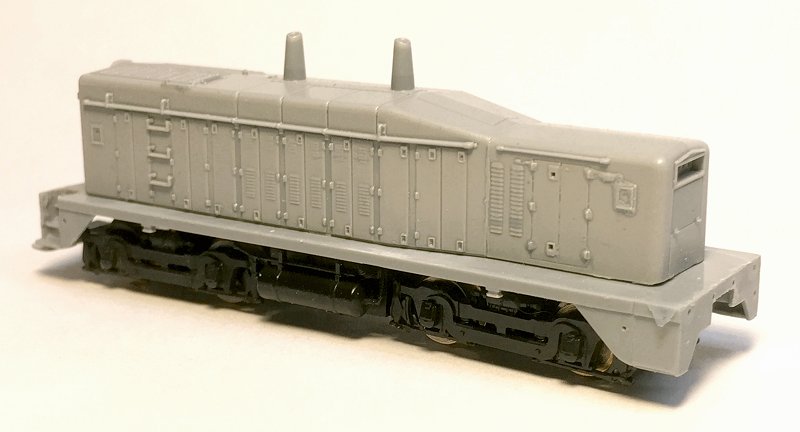
TR4B Conversion Shell and Frame $40.00
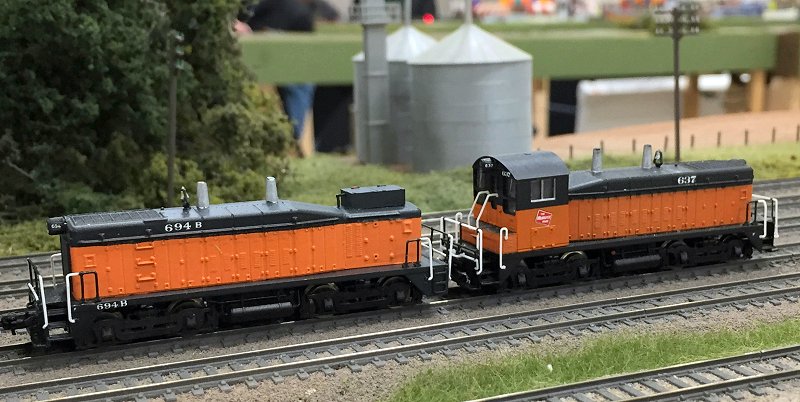
TR4 Cow and calf sets were designed to be used in switching and transfer duties. They were originally connected with drawbars, however many later had couplers installed and could be split up and mu'd with other locomotives.
This conversion will require modifying a Life-Like or Walthers SW mechanism to fit under the new narrow hood and changing the electrical pick up system. The basic build will be decribed below. Hopefully It should get you up and running.
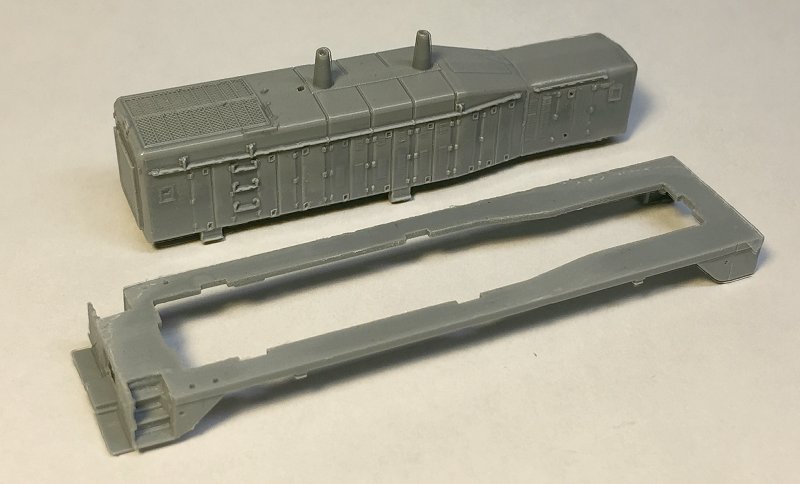
TR4B conversion shell and frame.
Basic TR4B Build
Basic TR4B Build
I'm going to document the basic build process for the Skytop Models TR4B conversion shell and frame. This will get you through the construction phase of the model and leave the final details up to you for your particular railroad.
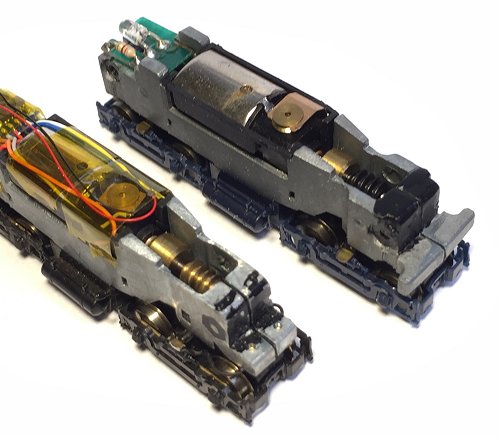
You will need to start with an Life-Like SW8 or SW9/1200 Switcher. The first step is to totally disassemble the model and modify the chassis to fit inside the TR4B shell.
Show below are two photos comparing the original chassis with the modified one.
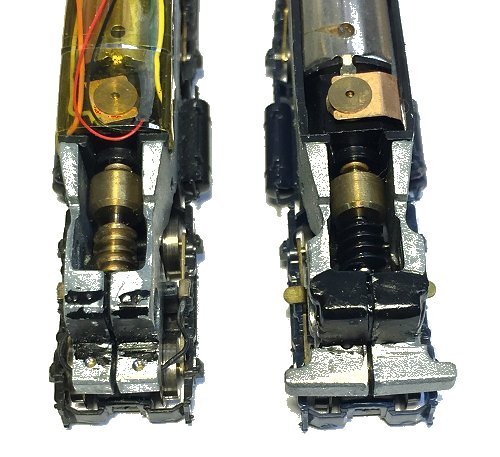
Once you have the chassis modified it should slip in and out of the shell fairly easily. You can also sand or file some material off the inside of the narrow part of the shell if needed.
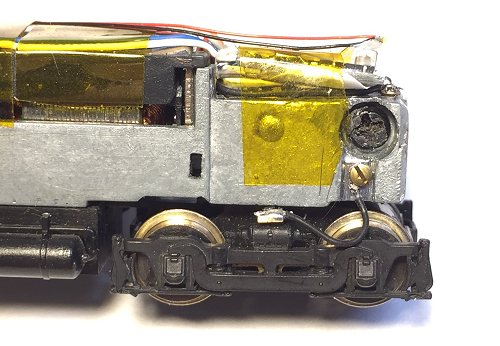
New electrical pick-ups from the truck to the chassis need to be added. This is the front truck and I drilled and tapped a hole for a Micro-Trains Z scale coupler screw. The screw was shortened by cutting it to half its length. I stripped one end of the wire and formed a loop that would fit under the screwhead. Tin the loop by applying a bit of flux and touch it with the tip of the soldering iron. Cut to length and leave a little slack for truck movement. The other end is attached to the brass nub on the truck, note that I trimmed this nub slightly. Tuck the wire behind the wheel and under the chassis when finished.
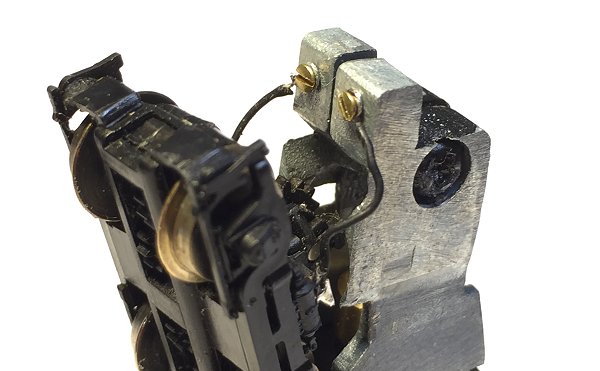
The rear electrical pick-ups are done the same way but since the chassis has been cut away in this area, I mounted the screws under the rear of the chassis. Test run the mechanism and make sure it runs smoothly. If you intend to add a DCC decoder now would be a good time.
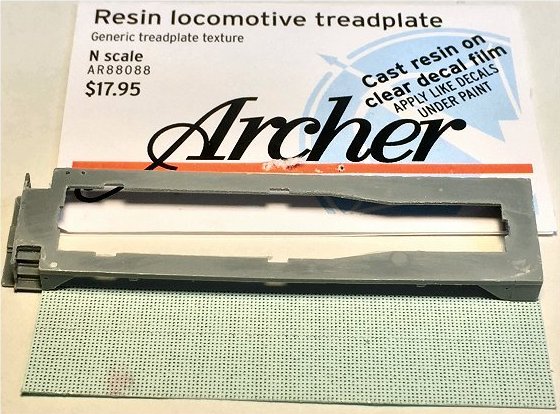
Archer Dry Transfers treadplate resin decals can be used to add some details to the frame walkway. This step is optional of course but is a nice touch.
Couplers should be added next but they will have to be glued or screwed to the frame. I use Micro-Trains Z scale couplers but regular MT #1015 coupler will work as well. The remainder of the build will depend on which railroad and unit you are modeling. If you've made it this far the rest of the project should be a breeze. Gather plenty of photos and have fun building this unique engine!
The rear of the chassis where the cab sits needs to be narrowed quite a bit. I did this with a cut-off disc in a dremel tool and cleaned it up with a file.
Keep removing material until a small window opens up in the outside of the chassis where the trucks attach. Reassemble and test fit inside the shell.
Once you have the chassis modified it should slip in and out of the shell fairly easily. You can also sand or file some material off the inside of the narrow part of the shell if needed.
New electrical pick-ups from the truck to the chassis need to be added. This is the front truck and I drilled and tapped a hole for a Micro-Trains Z scale coupler screw. The screw was shortened by cutting it to half its length. I stripped one end of the wire and formed a loop that would fit under the screwhead. Tin the loop by applying a bit of flux and touch it with the tip of the soldering iron. Cut to length and leave a little slack for truck movement. The other end is attached to the brass nub on the truck, note that I trimmed this nub slightly. Tuck the wire behind the wheel and under the chassis when finished.
The rear electrical pick-ups are done the same way but since the chassis has been cut away in this area, I mounted the screws under the rear of the chassis. Test run the mechanism and make sure it runs smoothly. If you intend to add a DCC decoder now would be a good time.
Archer Dry Transfers treadplate resin decals can be used to add some details to the frame walkway. This step is optional of course but is a nice touch.
Couplers should be added next but they will have to be glued or screwed to the frame. I use Micro-Trains Z scale couplers but regular MT #1015 coupler will work as well. The remainder of the build will depend on which railroad and unit you are modeling. If you've made it this far the rest of the project should be a breeze. Gather plenty of photos and have fun building this unique engine!